Where do you start when putting down flooring?


When you start putting down flooring, you may need help knowing where to begin. Sometimes, start at the room’s longest wall or a doorway. This will make the project much more accessible and ensure that the floor is installed in a straight line to look professional. You will also save time by reducing the number of trips back and forth to the miter saw or other cutting device.
Start at the Longest Wall
It’s a good idea to start your flooring by laying down a full plank against the room’s longest wall. Space it out about 1/4 to 3/8 inch from the wall (as directed by the manufacturer), and make sure the groove edge faces out.
Measuring the room, you plan to install your new floor is also a good idea. This will allow you to create a layout plan.
Scribe the First Row
If you install laminate flooring against an uneven wall, you must scribe the first row. This is a critical step in ensuring that the floor will lay properly.
Scribing the first row is a simple process. It does not involve expensive tools or special skills but requires accurate measurements and an understanding of how the flooring will be laid out.
Begin by laying out a row of planks with the tongue against the wall. Leave the language on to allow for a 1/4″ expansion gap between the wall and the edge of the first row.
Start at a Doorway
If you’re laying laminate flooring in a room with a doorway, staring at the wall with the door is an easier way to get it right. It also helps to keep the jambs and trim as close to square as possible, so you don’t have to undercut them as much.
When a doorway leads to another area of your home with different flooring, installing a transition strip is essential. This will make the transition from one room to the next look smoother and more uniform.
Start by snapping a chalk line across the doorway midway underneath the closed door (top drawing). Snap a second line perpendicular to this, centered in the jambs (bottom drawing). Dry-lay tiles along the third line to preview the size of cut tiles at the ends.
Use a Laminate Shear
When putting down laminate flooring, you’ll often need to cut boards to fit around obstacles. This includes things like pipes and toilets.
You’ll need a tool to make these cuts, such as a handsaw or jigsaw. The saw should have a fine-tooth blade that helps reduce splintering.
You’ll also need a tape measure, profile gauge, and combination square. These tools will help you make sure the pieces are cut to size, and they’ll also save time and energy when cutting.
Install the Underlayment
Underlayment is a crucial step in the flooring installation process. It offers a variety of benefits, including sound deadening, moisture protection, and cushioning. Underlayment comes in rolls made of polyethylene foam, felt, or cork. Rolls are from 30 to 100 feet long.
It is also a vapor barrier to prevent warping and bubbling in linoleum or laminate floors. It smoothes out slight irregularities and imperfections on the subfloor, like barely protruding screw heads and small knot holes.
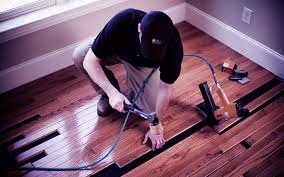
Install the Planks
When putting down vinyl planks, install the first row parallel to the longest wall in the room. This helps make the installation more symmetrical, making the space more spacious.
Depending on your personal preference and the shape of your room, you can run your vinyl planks in another direction. For instance, running them widthways can help if your room is narrow and long or you have a doorway in the middle of the floor.
Most vinyl planks attach edge-to-edge and end-to-end with a fold-and-lock tongue and groove design. The second plank is inserted into the groove of the first one, and it’s folded down flat and locked into place. Use a tapping block and a rubber mallet to ensure the two pieces connect flush.